
Astro: Adding comments to your blogs
Introduction
Feedback is an essential ingredient to any successful story, and blogging is no different. So how do you get feedback on your blog posts? Thats the job of the Comments Section. A comments section on a blog post is a valuable tool for engaging with readers, collecting feedback, generating ideas for future content, and even spotting errors in your writing.
If you’re using a popular blogging platform like Medium, WordPress, Wix or another similar service, the comment system is typically built-in. However, for blogs built with frameworks like Astro, the process is a bit more complex. Astro is a static site generator, and content is stored in Git in Markdown files, meaning there’s no native commenting system. So how can we add a dynamic comments section to an otherwise static site built using Astro framework.
In comes Giscus!!!
What is Giscus?
Giscuss is a comments system powered by GitHub Discussions. It lets visitors leave comments and reactions on your website via GitHub! And it is heavily inspired by utterances a lightweight comments widget built on GitHub issues that uses GitHub issues for blog comments, wiki pages and more!.
Giscuss is open source, has no tracking, no ads and is always free. Thers is no database needed and all the data is stored in GitHub Discussions. It also comes with some fancy features like supports for custom themes, multiple languages, extensively configurability, automatic fetche of new comments and edits from GitHub and can be self-hosted.
In this post, we’ll walk through step-by-step how to set up and integrate Giscus into this blog, allowing readers to leave comments and feedback easily. When you are reading this blog you should be able to scroll down and leave a comment in the Comments section powered by Giscus.
Setting Up Giscus
Let’s dive into how to configure Giscus to display comments on blog posts. To get started, you need to meet the following requirements:
- Have a Github repository.
- The repository must be public.
- The Giscus app must be installed on GitHub.
- GitHub Discussions must be enabled for the repository.
- A category must be created for blog comments.
- Finally add Giscus comment section to your blog.
Creating a new public GitHub Repository
- Go to GitHub. If you have a account on Github, Sign In to your account. If not, Sign Up to create a new account.
- Once you are logged in click the + (Plus) sign in the menu bar on top-right and select New repository from the dropdown.


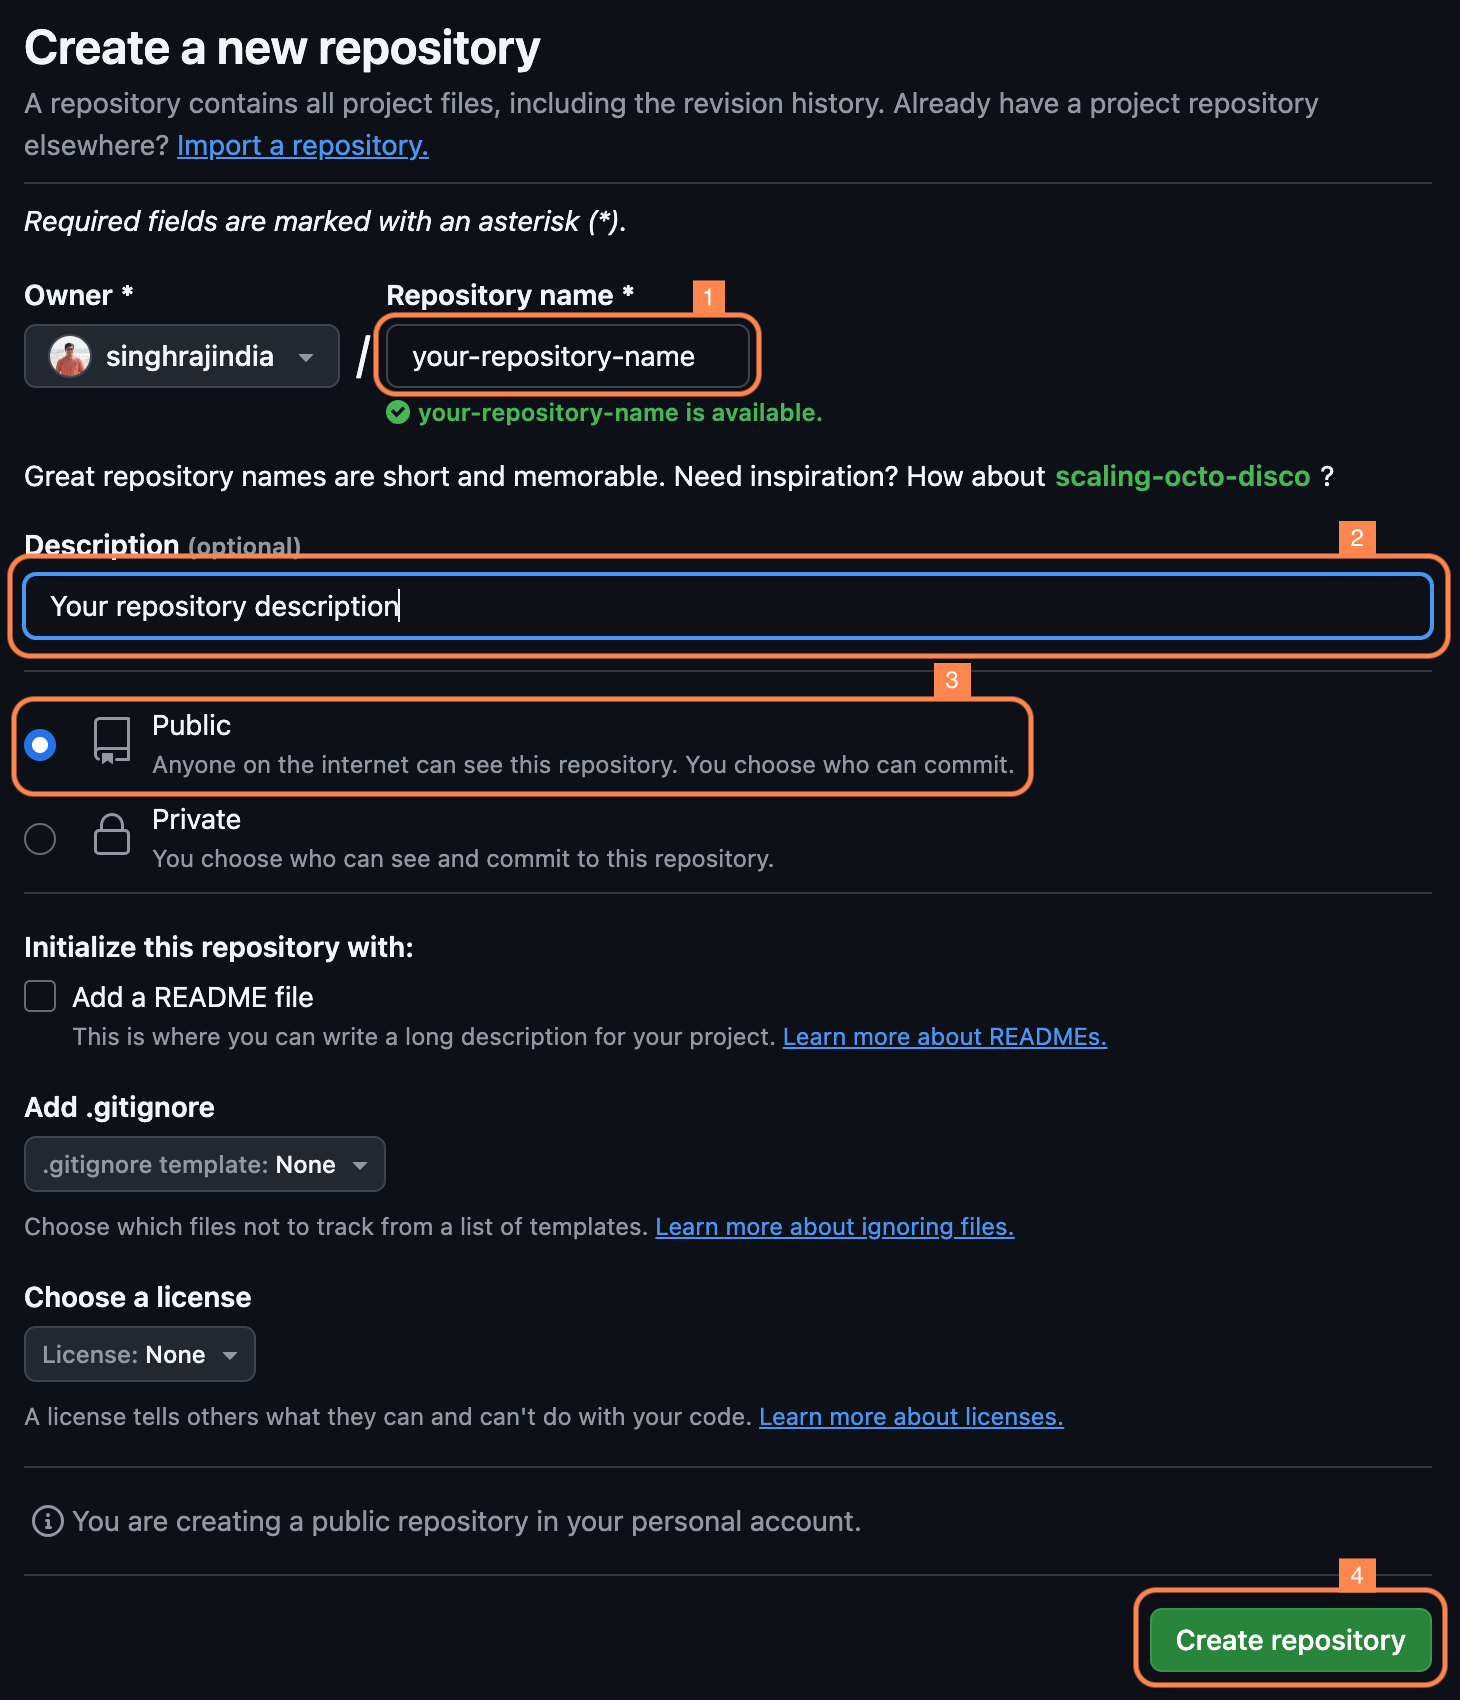
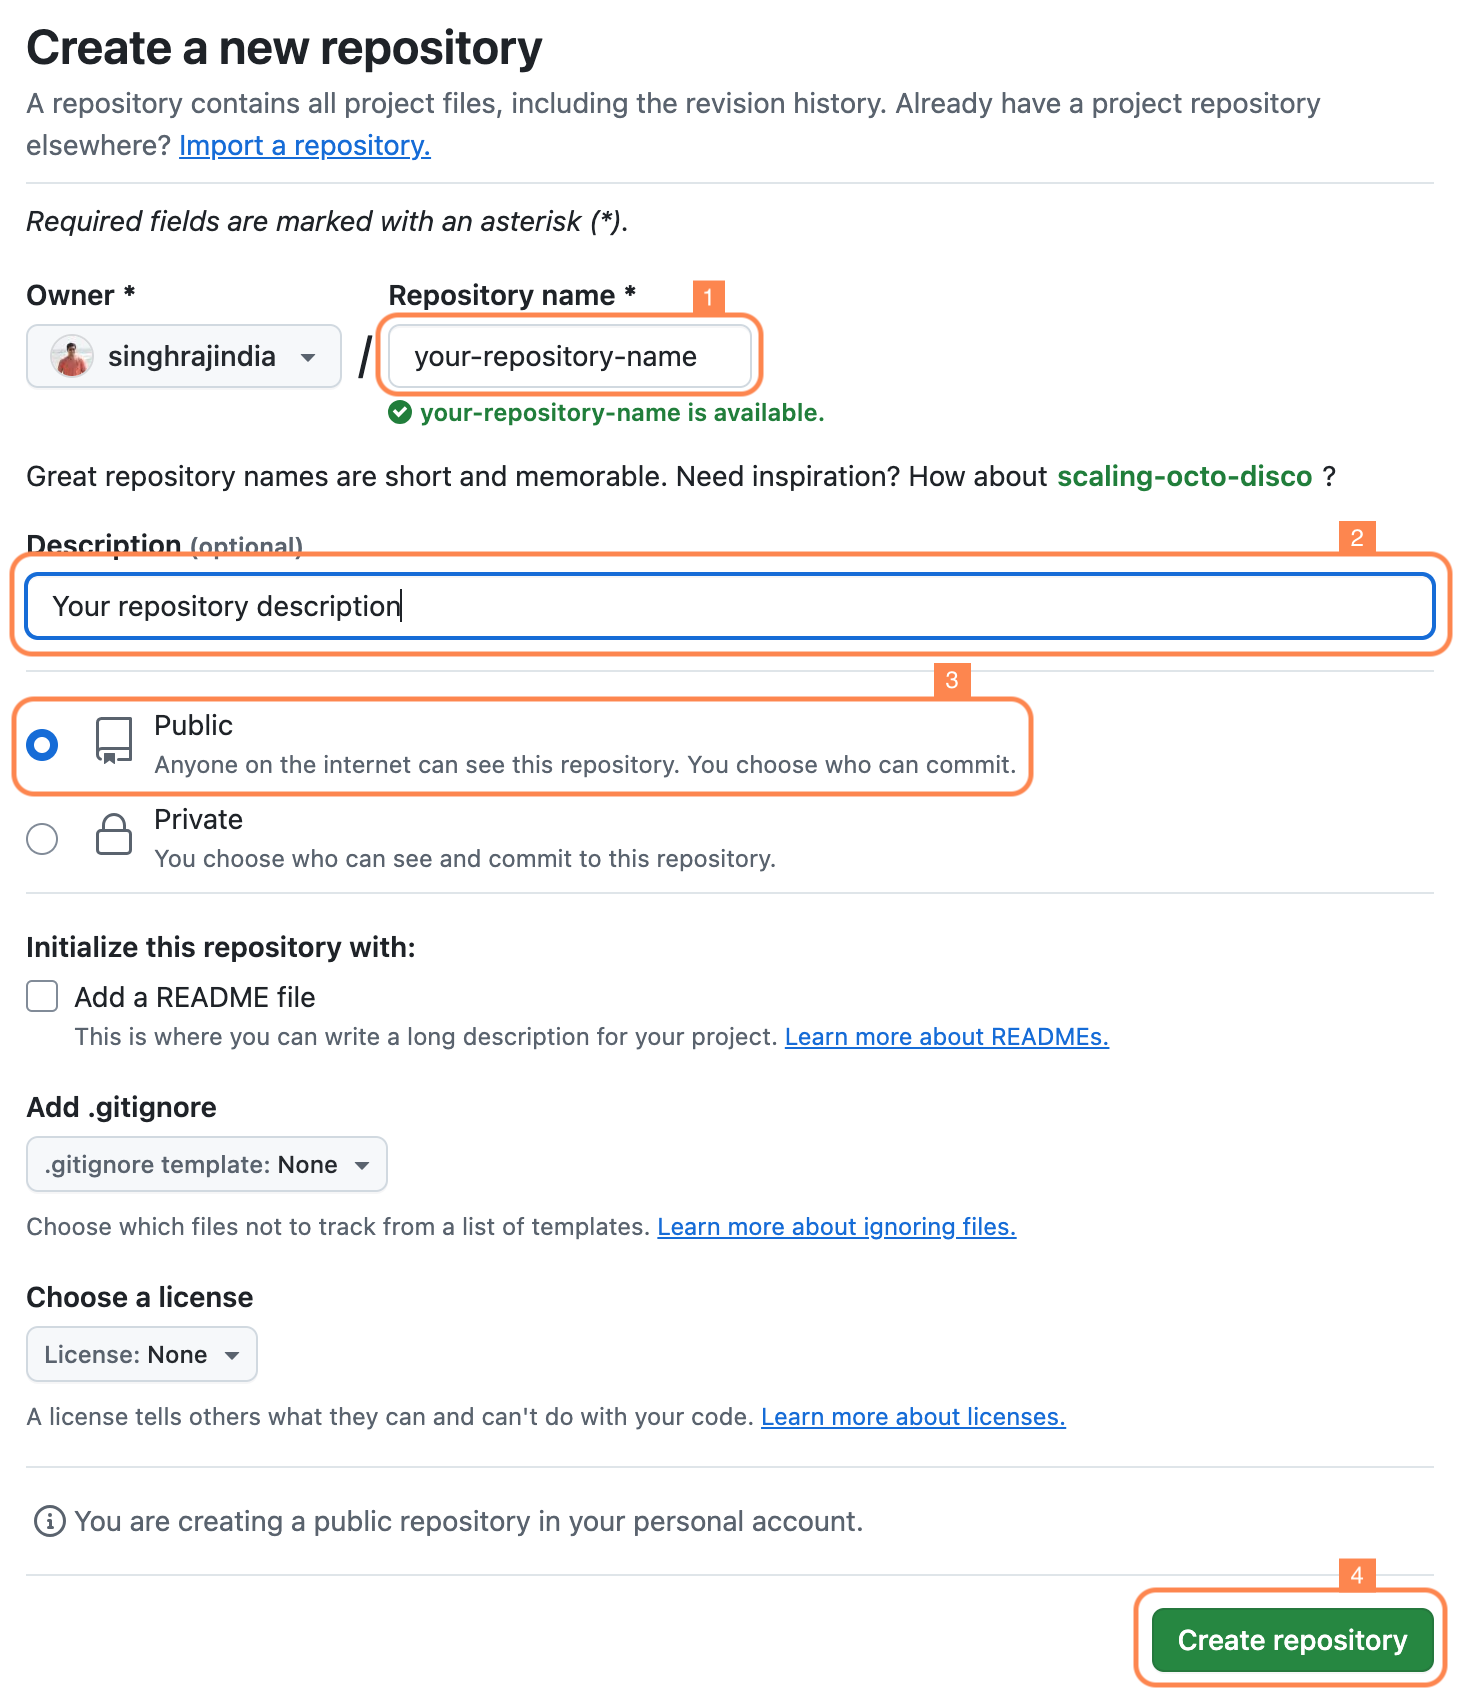
- On the next page specify the Name and Description of the repository. Keep the repository as Public. Click Create Repository buttom at bottom-right of the page. Please note that, for Giscus to work properly, it is necessary that the repository is public.
Install Giscus App on your GitHub Repository
Next, you’ll need to install the Giscus app on your GitHub repository. This app facilitates the creation of discussions and allows users to leave comments. When a reader leaves a comment for the first time, the app will automatically create a new discussion.
- Go to Giscus App Page page.
- Click on Install button (if this is your first time installing the app) or Configure button (if you are modifying the app settings or configuring Giscus for another repository). Either of the buttons would show on the top-right of the page.
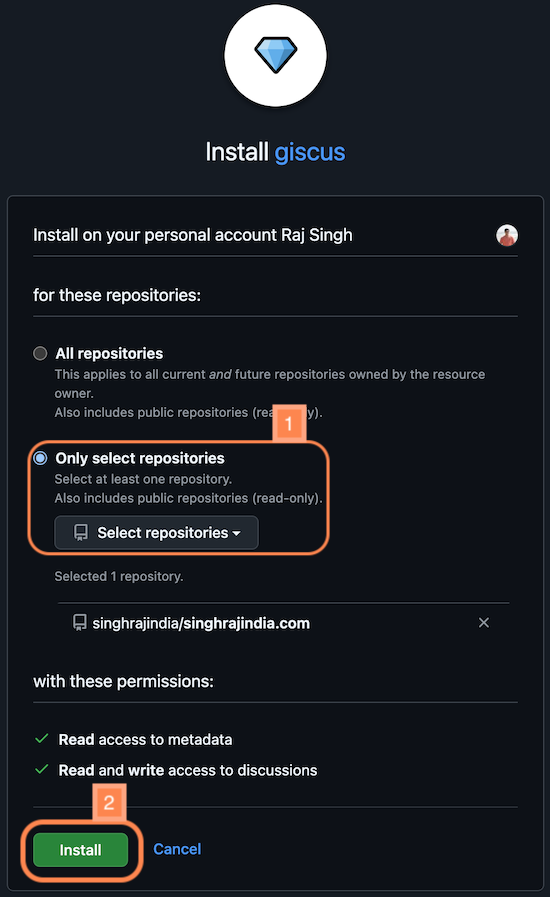
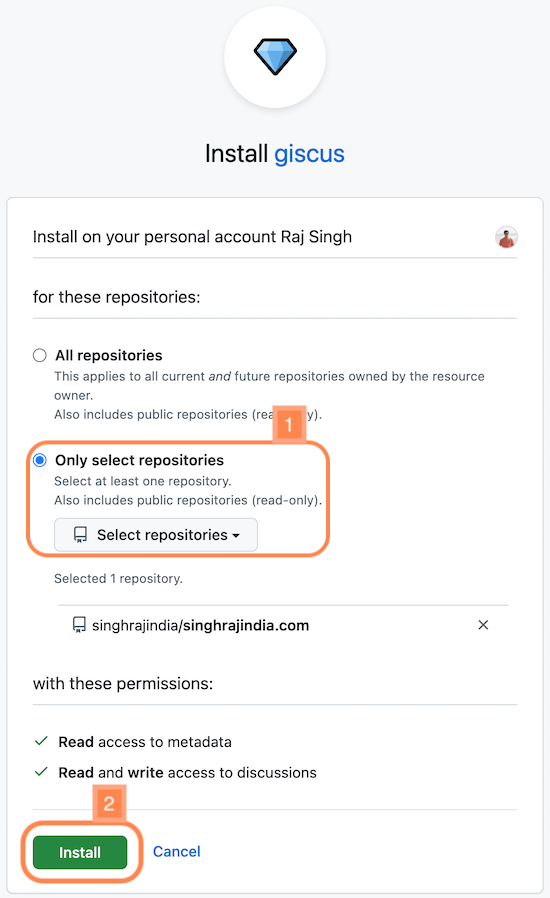
- On the next page select Only select repositories and select the required repository frm the dropdown. Click on Install button at the bottom of the page.
Enable GitHub Discussions on your Repository
To enable GitHub Discussions for a repository
- On GitHub, navigate to the main page of the repository.
- Under your repository name, click Settings.


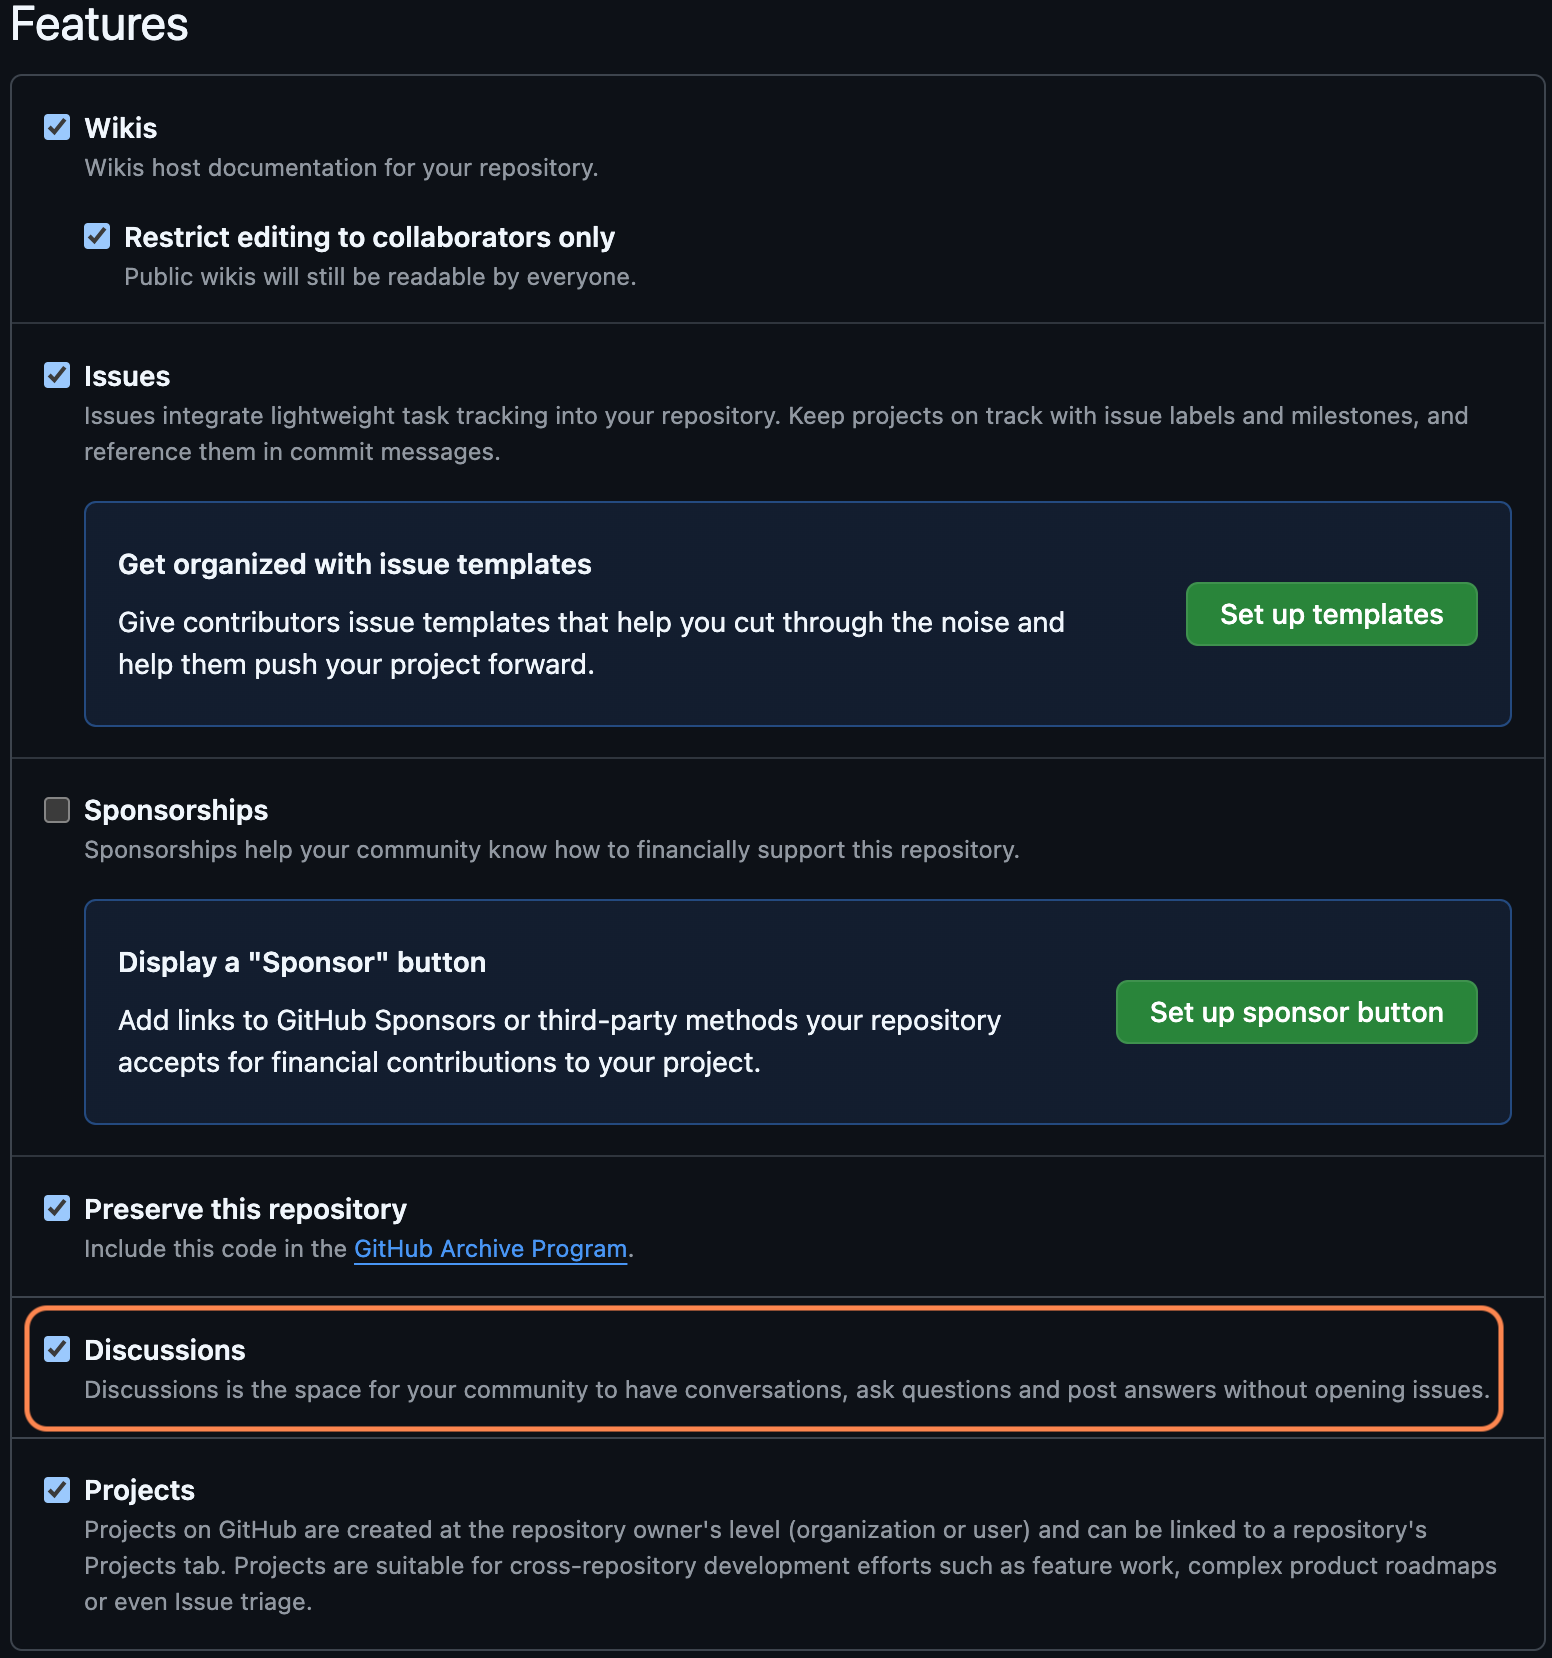
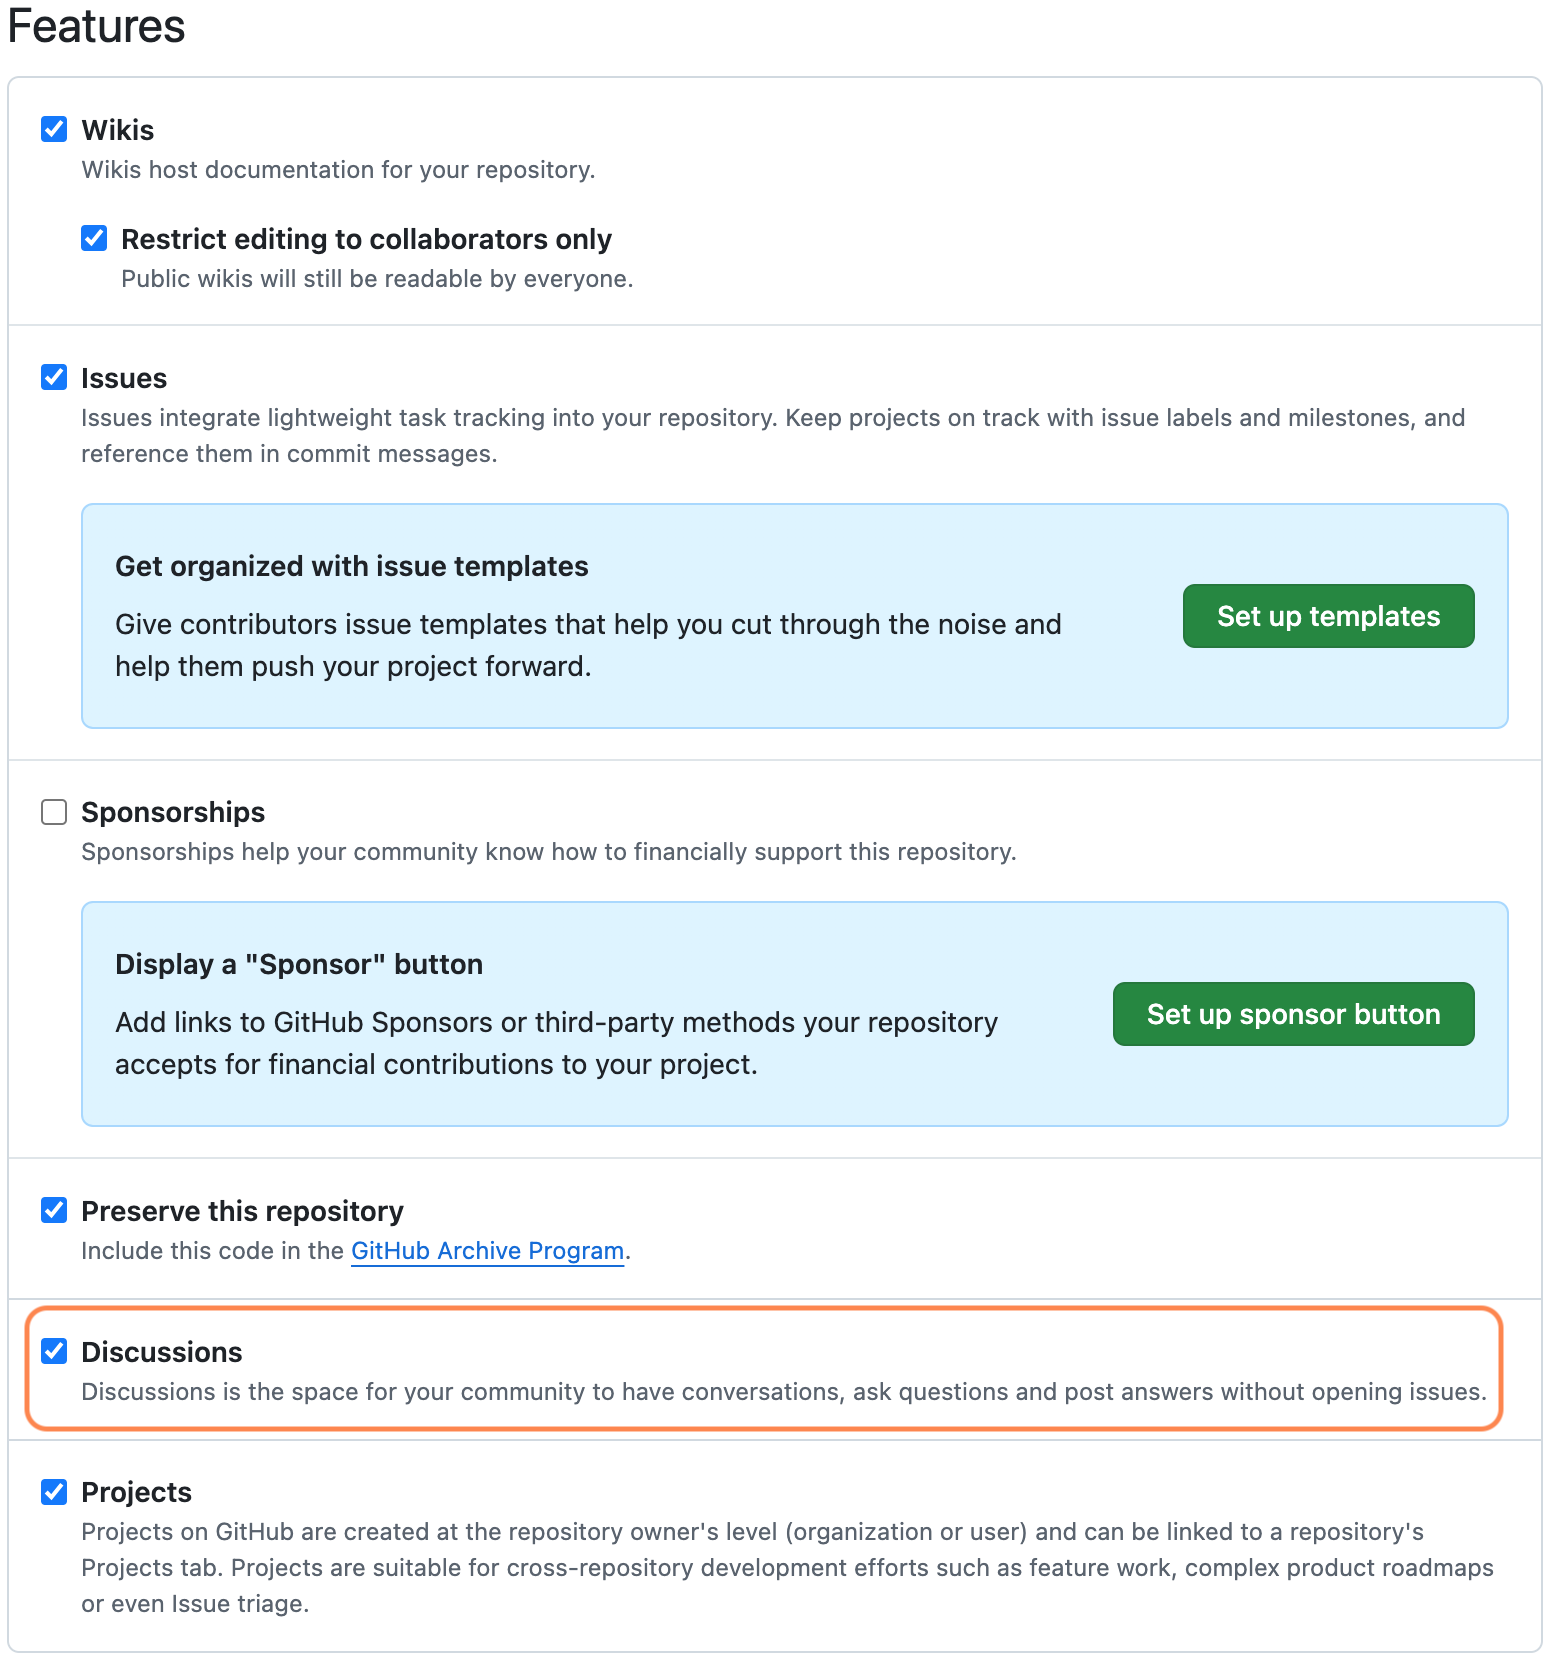
- From the left navigation make sure General is selected. Scroll down to the Features section and select checkbox for Discussions.
Create a Category for Blog Comments
Finally, create a specific category for blog comments within GitHub Discussions. To do this,
- Navigate to the Discussions tab in your repository.


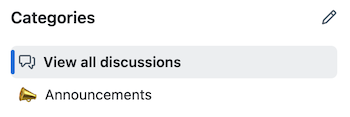
- On the next page on the Categories menu in the left menu, select the Pencil icon to edit categories

- On the next page create new category by clicking New Category button on top-right.
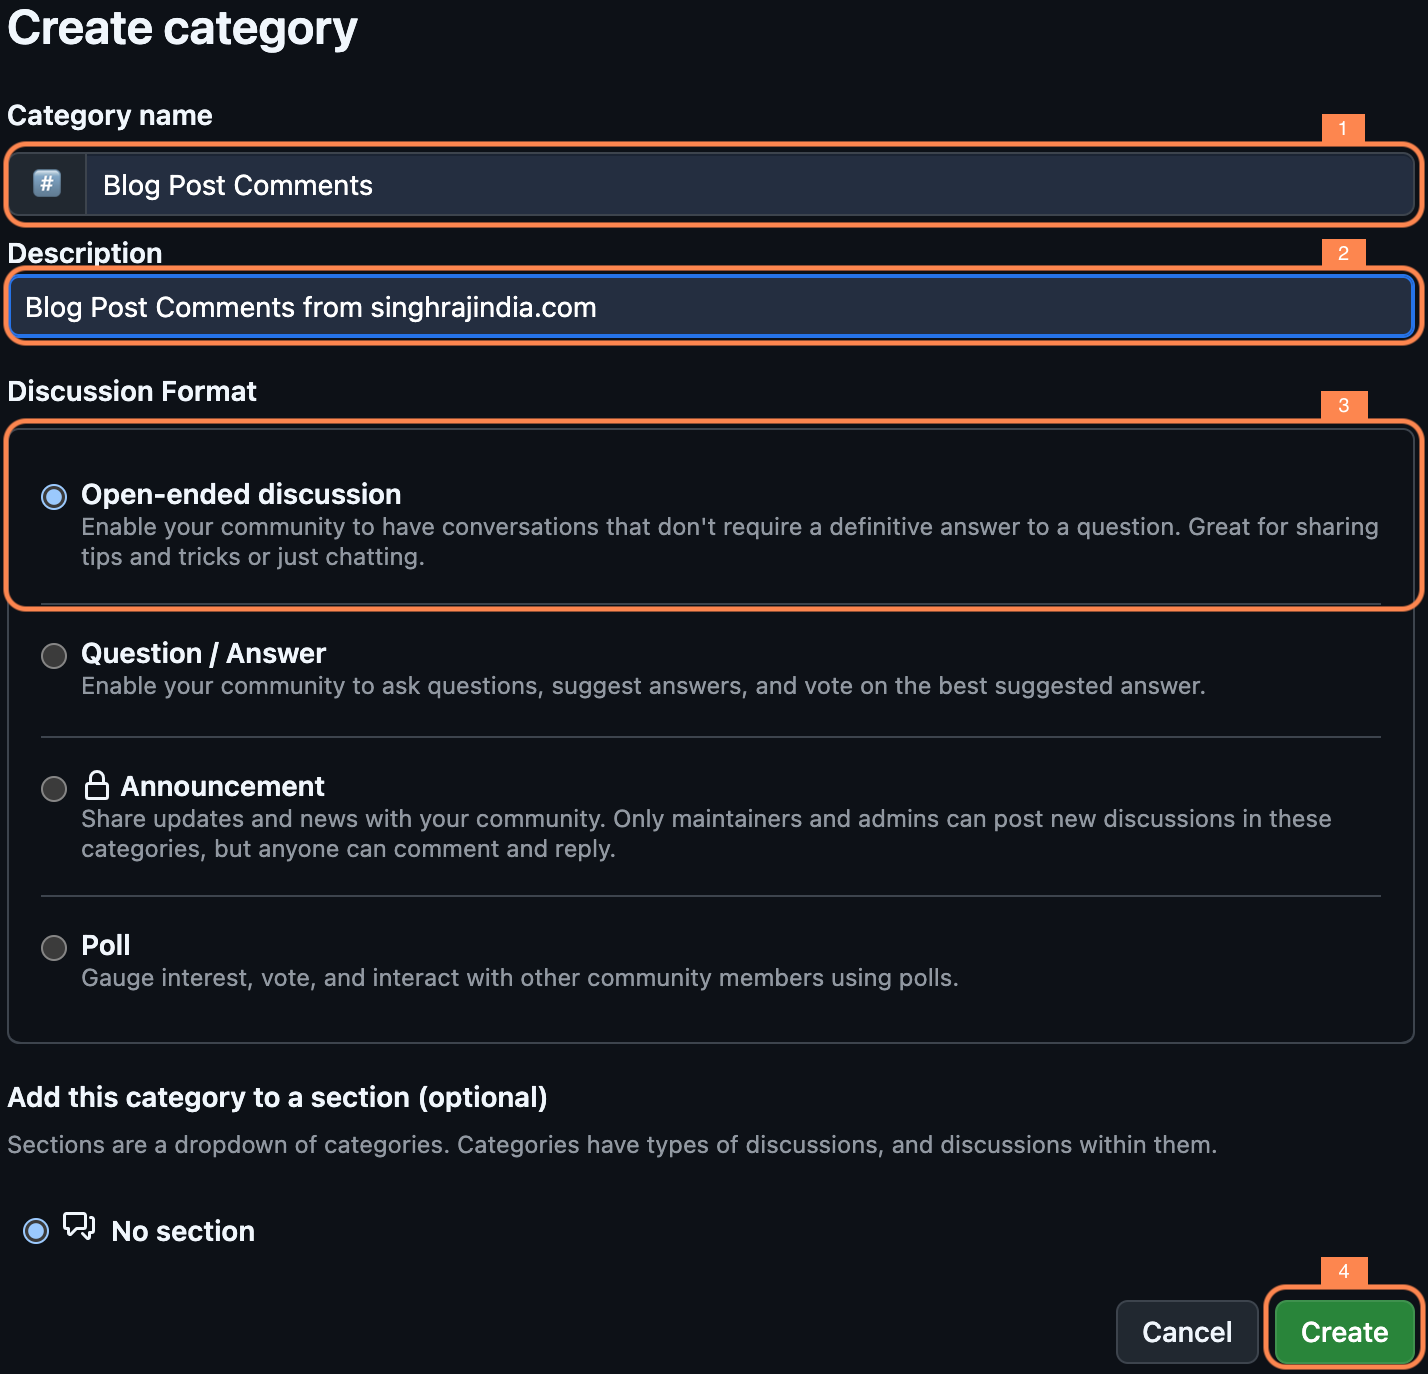
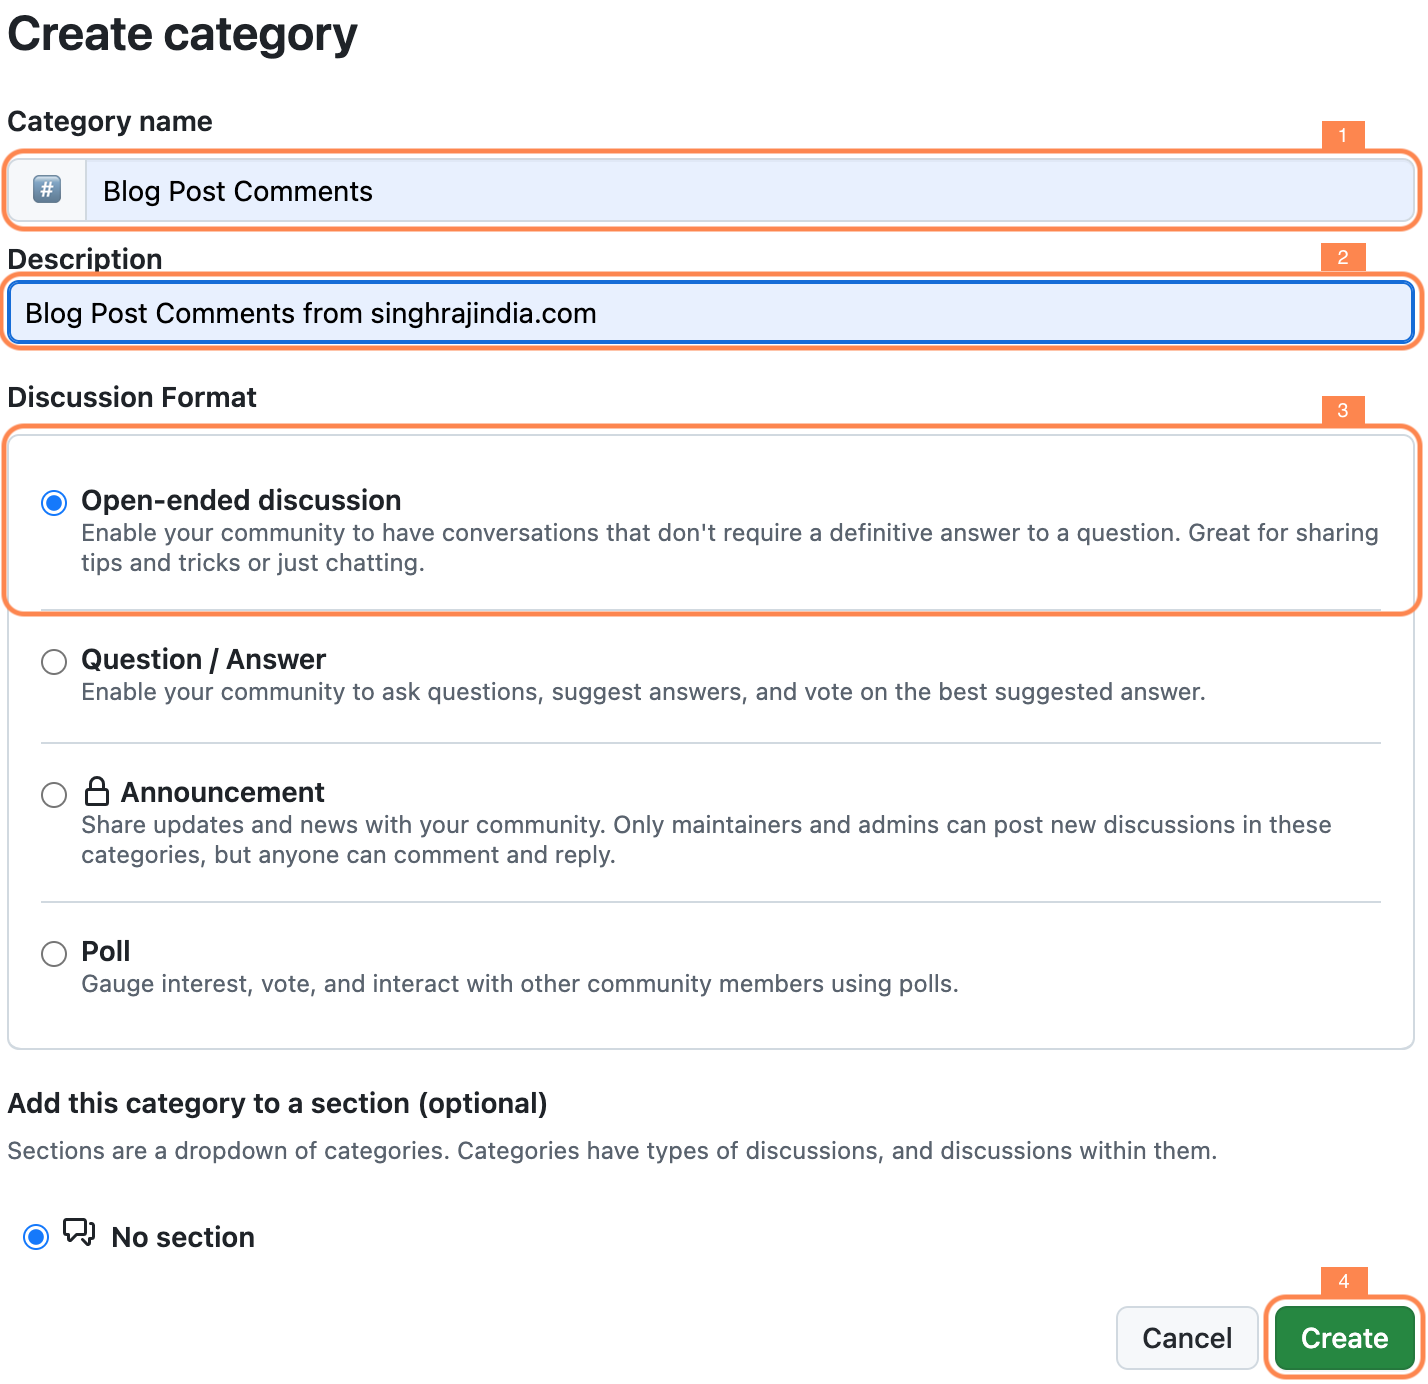
- This will open new page where you need to provide details of the new category like Category name, Description and Discussion format and click Create button on bottom-right of the page.
Test if everything has been setup right
Above steps are all that take to setup Giscus. To make sure you have got all the steps right Giscus provides a way to validate it.
- Go to Giscuss App home page and scroll down to Configuration section.
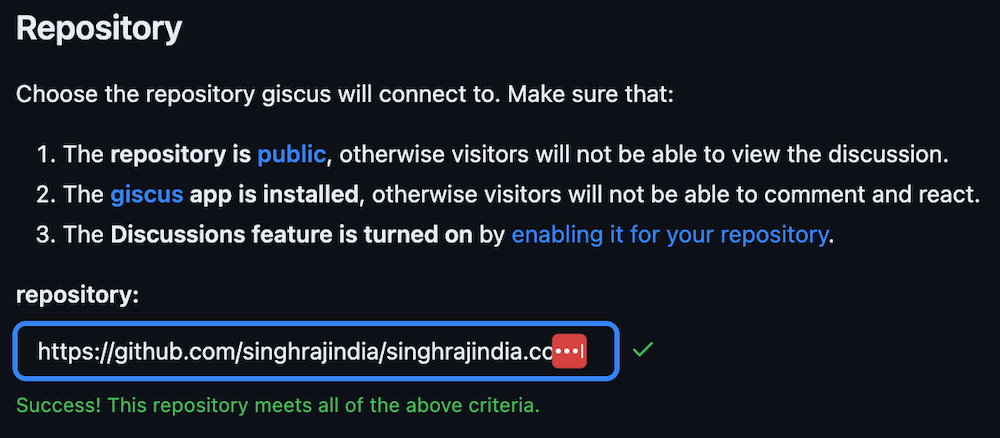
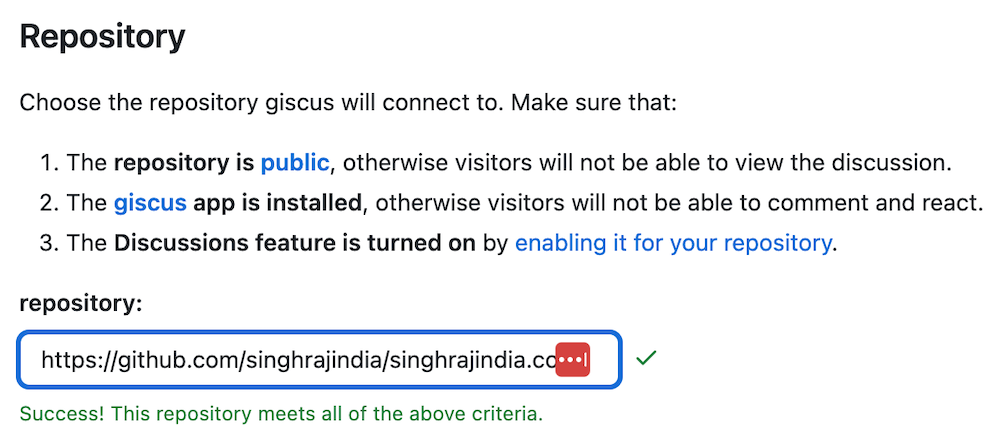
- Under Repository segment it lists out the steps that we have followed above. Enter your GitHub repository URL (on which you enabled Giscus) in the textbox provided below the steps.
- It should display a message in green stating “Success! This repository meets all of the above criteria.”
Generate code for comments Section
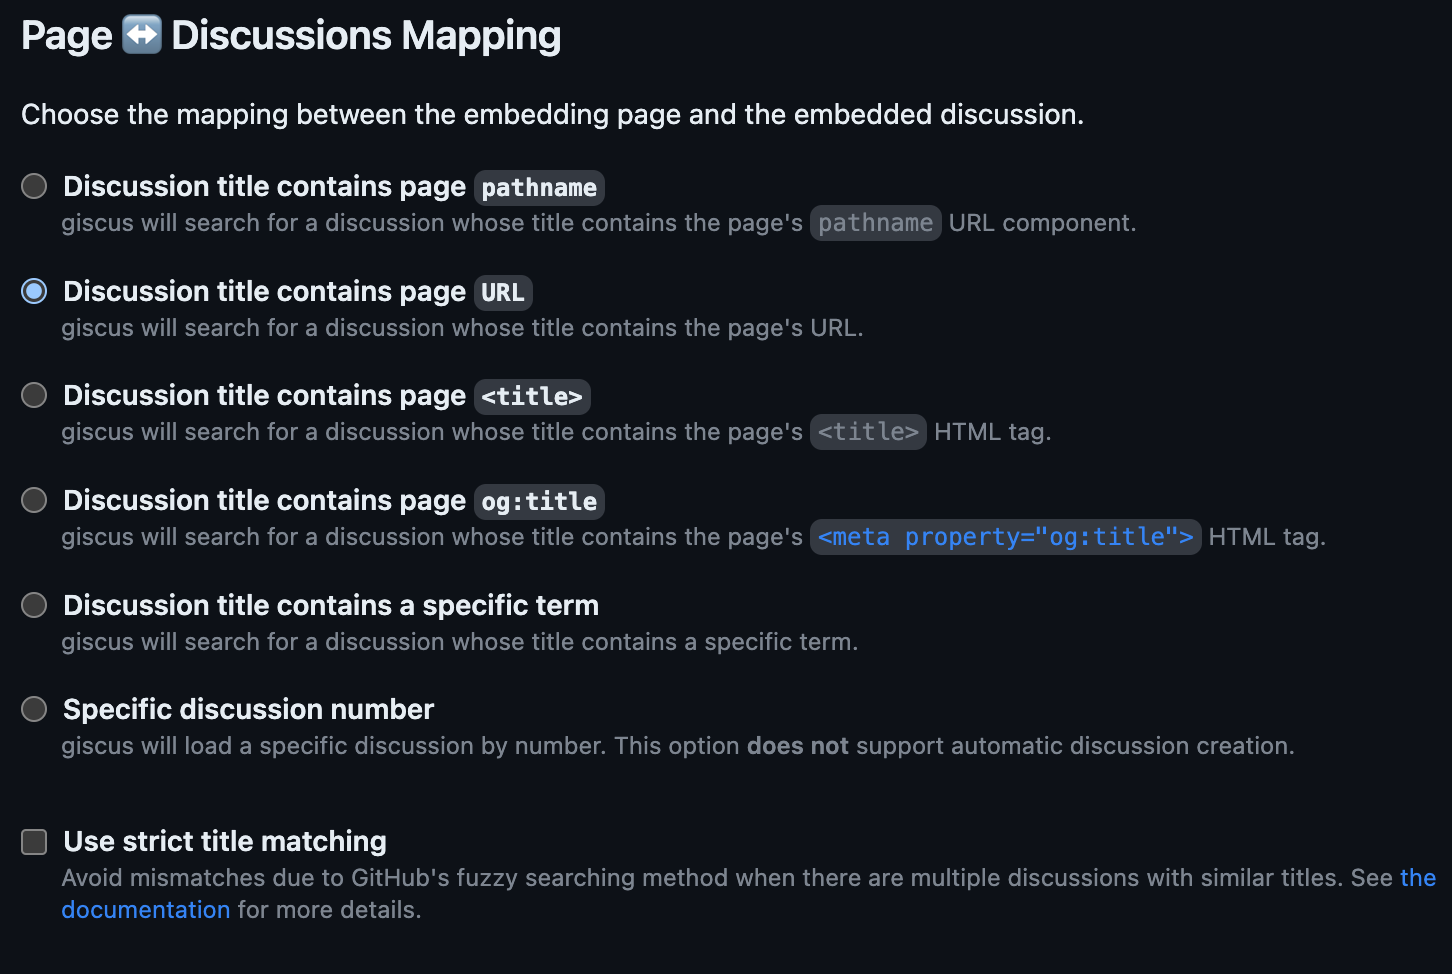
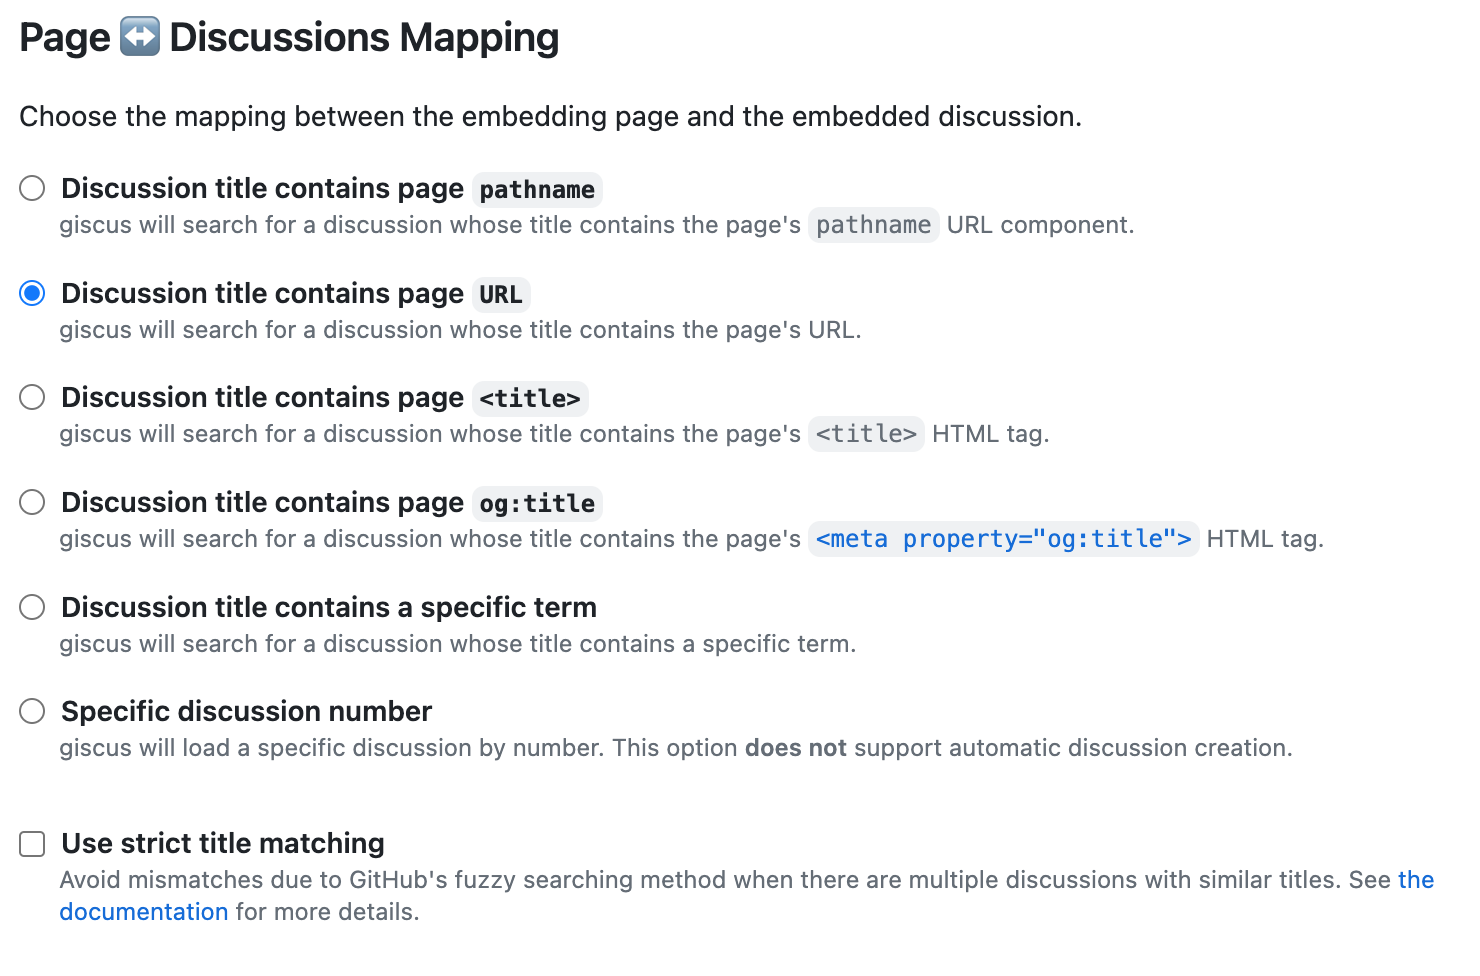
- On the same Giscuss App home page scroll further down to Page ↔️ Discussions Mapping section and select second option Discussion title contains page URL
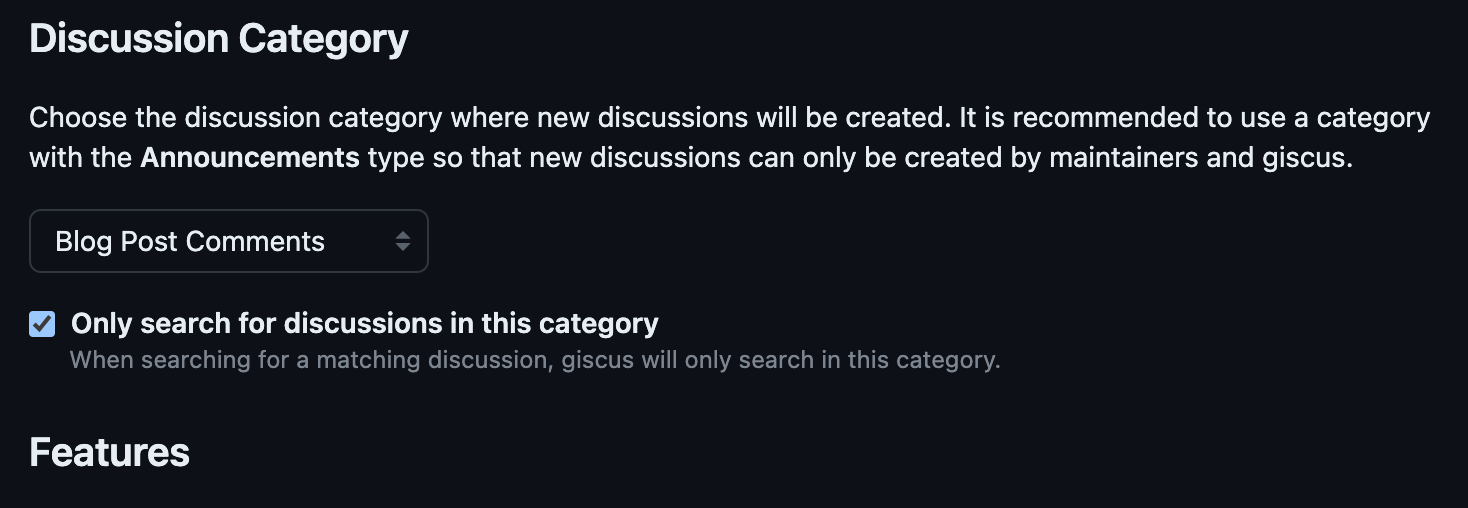
- Scroll further down to Discussion Category section and from the dropdown select the Category you created in the above steps.

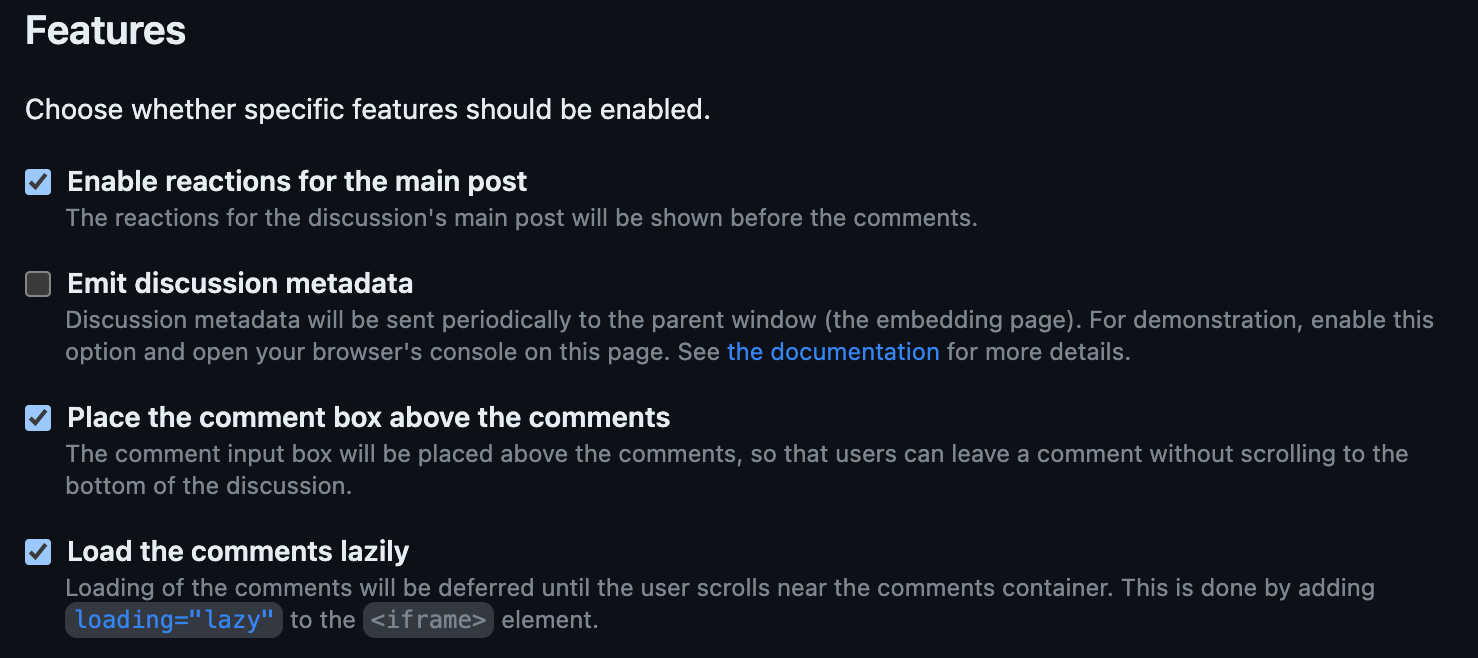
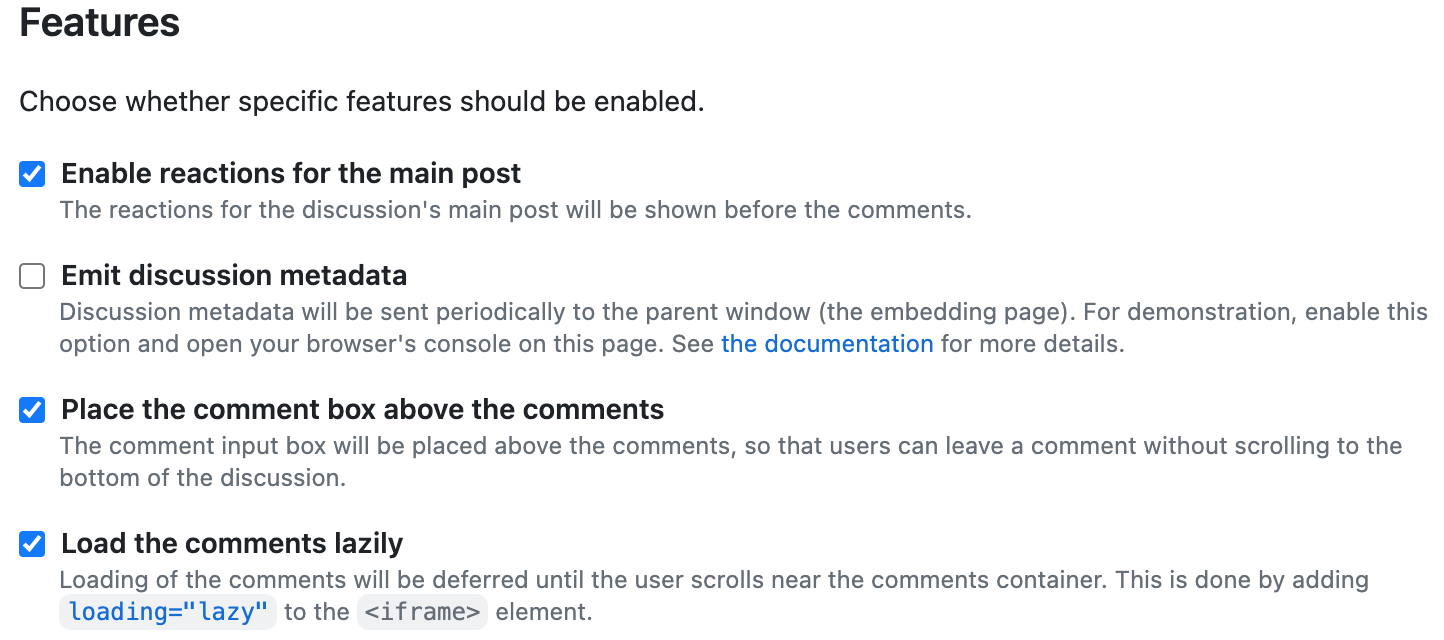
- In the Features section select the features as per your liking. I selected the options as shown in the image below.
- In the Theme section select the theme as per your liking.


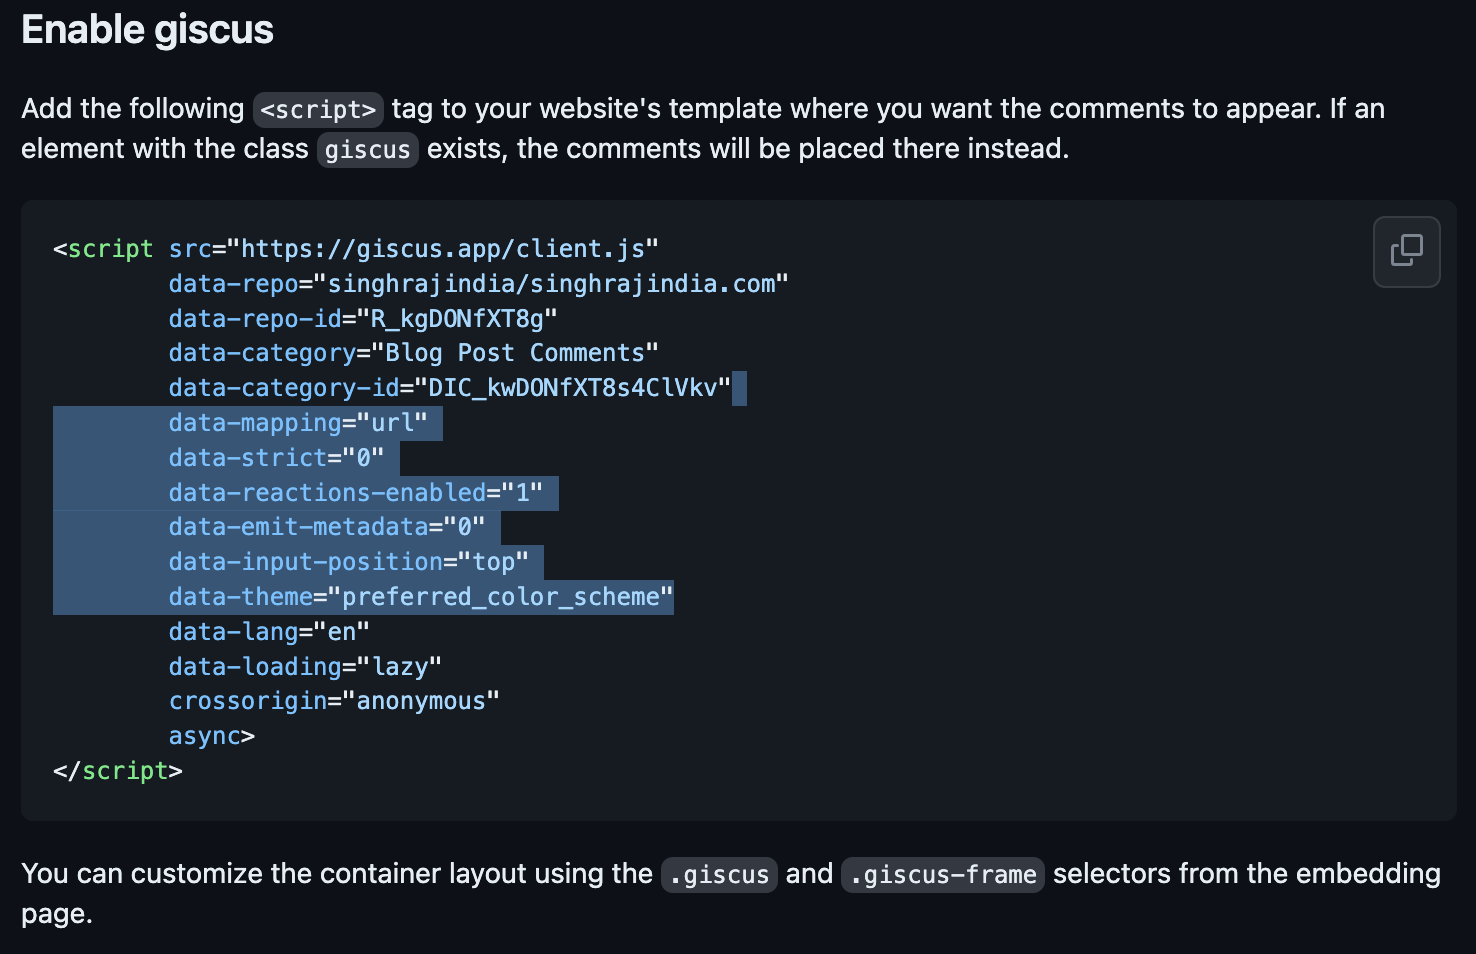
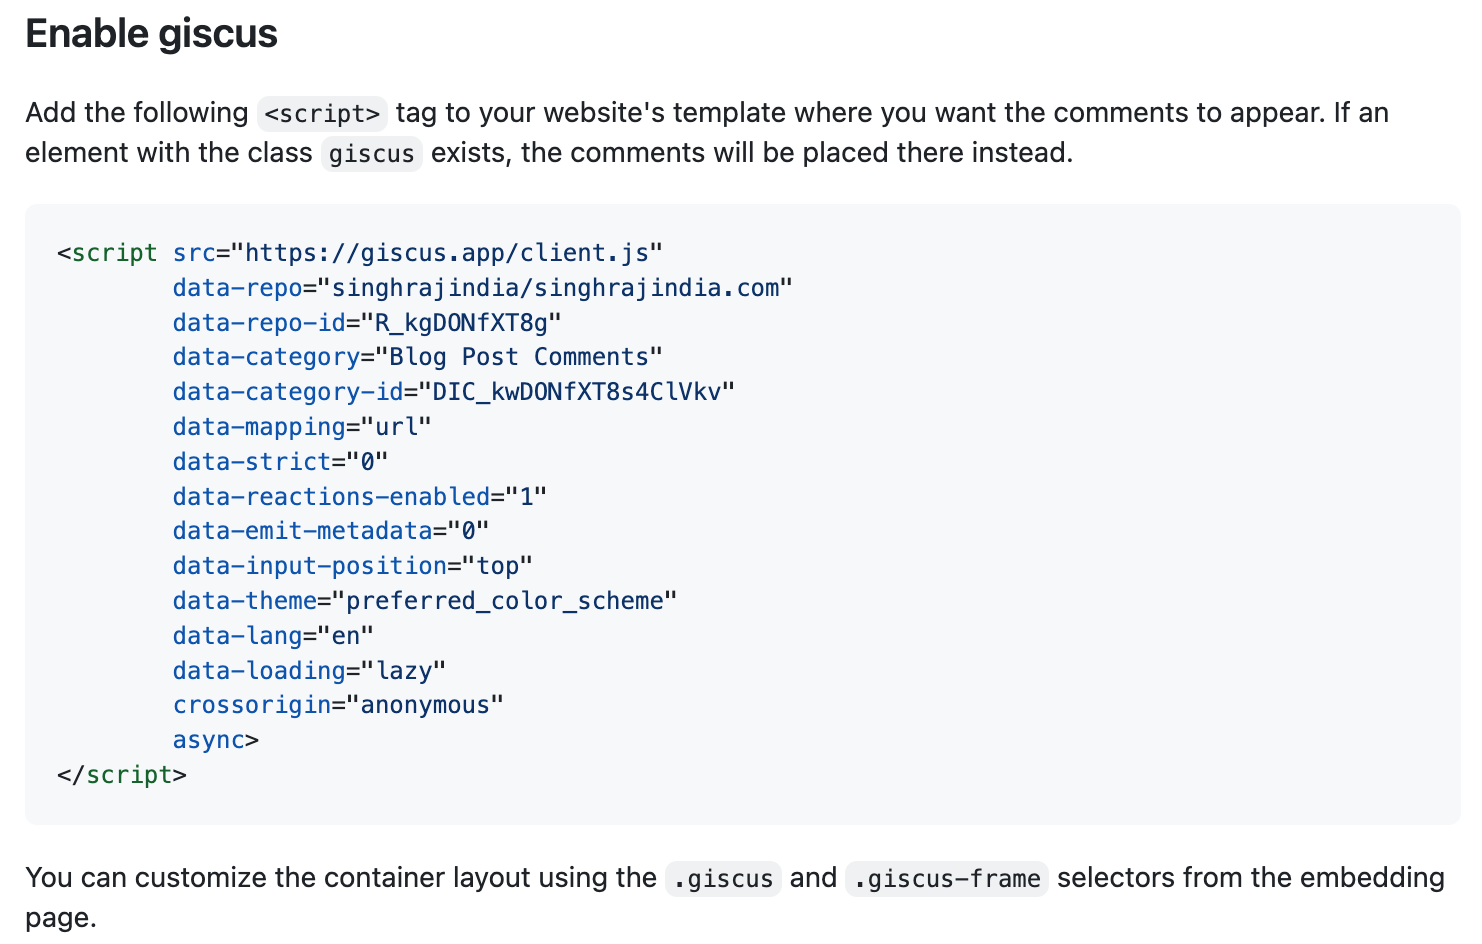
- Below it would generate code as shown below.
Add Giscuss Comments Section to your Blog
- Create a new file layouts/components/blog/BlogComments.astro in your astro project
- Copy the following code in the file. The script tag was as generated in the step above. The section tag with giscuss class is where the comments will be placed.
<section class="giscus p-6 mt-6"></section>
<script src="https://giscus.app/client.js" data-repo="singhrajindia/singhrajindia.com" data-repo-id="R_kgDONfXT8g" data-category="Blog Post Comments" data-category-id="DIC_kwDONfXT8s4ClVkv" data-mapping="url" data-strict="0" data-reactions-enabled="1" data-emit-metadata="0" data-input-position="top" data-theme="light" data-lang="en" data-loading="lazy" crossorigin="anonymous" async></script>- Copy the following code to the top of the page where you want the comments section to appear
import BlogComments from "@/components/blog/BlogComments.astro";- And add the below code in the page where you want the blog to appear.
<BlogComments />Now you’re ready to start receiving comments from readers!
Note: as of writing this blog post Giscus still requires signin using GitHub account before the user post a comment. There is a discussion ongoing to allow anonymous comments, but so far there has been no progress. You can follow the discussion here.